9 Easy DIY (Do It Yourself) Craft Ideas Step By Step For Home | Styles At Life
Are you looking for to easy making things of Crafts? There are various specials and merely super Diy Crafts right now. Making homemade crafts may seem very tricky to people will fall in love with those Diy Crafts. You will be amazed at the creative arts of little imagination. Now cheer and spread Spread with these sweet and straightforward Diy handmade gifts to the occasions which will be really amazing to those and be happy forever.
Ordering everything online it is better to practice and follow the Diy Crafts for the event which you want to be attained with amazing Gifts. The inexpensive Diy Crafts will fool every person of thinking you spent the hunk of your own creativity which looks very million bucks on the Diy Crafts Ideas. Make some cute crafts by our own that no one knows you are DIY Creations!!!
Best DIY Crafts Ideas Step By Step For Home:
Let’s find here with mention top 9 Diy crafts step by step for your home.
1. DIY Crafts for Adults:
To give any surprise gift for your neighbors then make a special Diy Crafts which gives very special with love. Make a charm bracelet is personable which will make very memorable gift diy crafts for adults. This DIY charm bracelet is absolutely beautiful and to collect your favorite to give this bracelet and even more meaning. Let’s learn how to make a charm bracelet for skinny hand for the perfect passion to the fabulous fashion accessory.
- Customize your bracelet by using different charms of Crystal, Miscellaneous by using Chainmail/Wire work with full of butterflies and flowers and Perls.
- The process of making diy crafts bracelets can finish in one evening to makes very surprising.
- To make in different ways to enhance the charm bracelets where it makes absolutely very precious
2. Personalized DIY Crafts:
To make together to form one pretty personalized dIY craft flowers then some fabric flowers were thrown a pin on the back with your favorite outfit for a fashionable look. This is a great chance to use the fabric scraps. Even you don’t use a sewing machine to complete this simple flowers. Take simple needle and thread to bring your flower to life.
- To get fabric flowers with longer petals, you will need to cut long strips of fabric. For small petal small strip of fabric is enough.
- Cut the two strips of netting or tulle the same length and height as your cotton fabric. With the pinking cut petals in shapes of slightly descending height on the fabric cloth.
- It is freehand, but you might want to draw them with a pen for the first time.
- Next, take the fabric at one end sew a running stitch across the bottom of the layered fabric now do on a sewing machine for getting basting switch into a flower shape.
- After knot the thread. Arrange the fabric pleasing in a manner of obtaining the shape of larger and smaller petals. Finally, fluff up the petals by separating them add the glue at the center and attach three buttons.
- Therefore learn how to make fabric flowers to look our home very special……
3. Kids Special DIY Crafts:
Feel free to explore your talent on making various diy crafts for kids with own intention you have. To make Glass Photo Jewelry on pendant tray is a straightforward process which we can complete in one day. Below are the few steps to make photo gallery jewelry which makes very auspicious to your neck chain
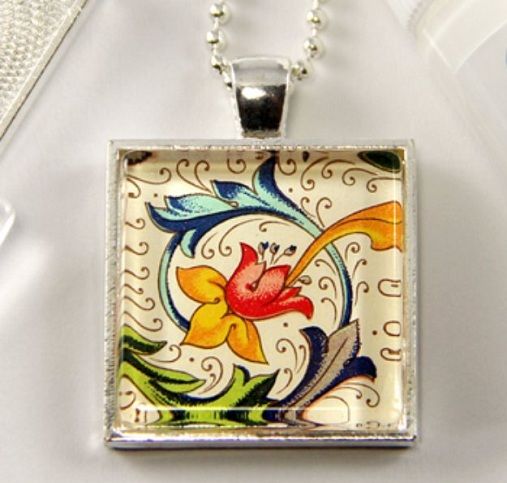
- Make your own glass by wiping with a lint-free cloth. Therefore be sure that your hands are of lotions which may produce the Glamour Seal from adhering to the glass.
- Choose the untrimmed decorative paper which you’d like to use. And take your clean glass tile, and apply a thin coat of Glamour Seal. Working fast and place the glass tile Glamour Seal side bottom on the patterned side of your decorative paper. Then you will be able to appear through the glass to the patterned paper.
- Now press the glass down onto the paper with your thumb use a tabletop and or other flat surfaces underneath to the paper. Ans you can also use, firm pressure. Where it removes any air bubbles in the Glamour Seal. If you see excess Glamour Seal ooze from the edge of the glass, just wipe it off.
- Draw your design in a paper which looks very beautiful on pendant jewelry
- Using a fresh, sharp X-Actoblade put the glass tile paper-side down on a cutting surface. Carefully trim the excess paper from the edges while pressing firmly to the glass tile.
- Finally, Apply a thin coat of Glamour Seal to the back side of the pendant. You want enough to come into contact with the pendant tray.
4. DIY Crafts for Mothers:
If you want to present a gift to your mother on his wedding anniversary, then think and plan your own product of making easy diy arts and crafts. Make a hand mug to you mother which he feels delighted while she was drinking on the mug which you deserved to her. Check the proper way to make Hand Painted Gold Mugs.
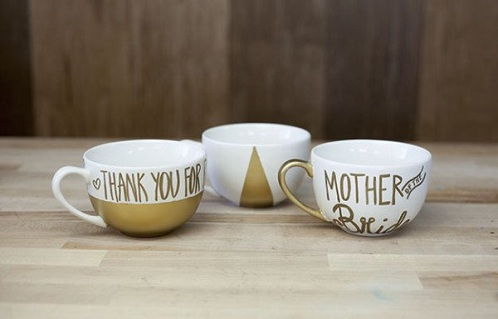
- Mask your hand-painted mug into the unique and various designs you want to use masking or painter’s tape. You can also mask across the top of the mug to seal the inside, the mug.
- Continue masking around the hand mug until your design is complete! And make sure that you have to cover up the outside of the cup everywhere. And cover all the parts where you do not want to paint.
- No, we use we used aluminum foil to cover the inside of the mugs. This ensures that no spray paint finds its way inside!
- Take your hand mugs outside and place on an elevated surface where are sprayed painted. Once you have to sprinkle and decorate your own design, and turn over and brush again.
- Turning the mug over ensures you do not miss any spots you want to be covered. Once the paint part is dry, you may begin and to be careful peeling off the tape.
- Using an Expo marker of the pen, go over all of the unwanted paint spots and wipe clean part with a paper towel. Continue until you use Expo marker until all the unwanted places are gone.
- Now use a permanent gold marker that matched the gold spray paint, we decorated the mugs.
- We write on the hand mug which says, for example like, ‘Mother of the Bride’ and ‘Thank you for raising the man of my dreams!”
- Once completed retouching the gold paint and writing your messages, then take the mugs outside once more and spray them down with Clear Sealer Spray.
- There you have it! Everyone will love these hand painted gold mugs, will want you to make their DIY crafts wedding gifts!
5. Christmas DIY Craft Ideas:
If you want to decorate your home on the festival of Christmas, then celebrate the various special diy crafts to design your home by making small dollar-store tea light which gives light to your home on the occasion of Christmas by the following diy crafts step by step..
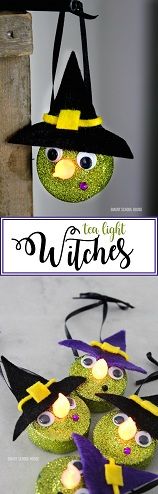
- Made a circle of Dharmocoll sheet cut into three half of it
- Then add green color chumkeys to look lighted at the night
- Then add eyes with which and black color.
- First of all, take a Green flameless tea light and some simple craft supplies
- Take a little ribbon which you can easily fashion the set into glowing garland.
- Now drape on a doorknob or use them to decorate your Christmas tree.
- Add a magnet to the back, and teeny trinket instantly becomes the cutest fridge accessory you’ve ever seen.
- Turn the light and the flame becomes the witch’s glowing nose for nighttime
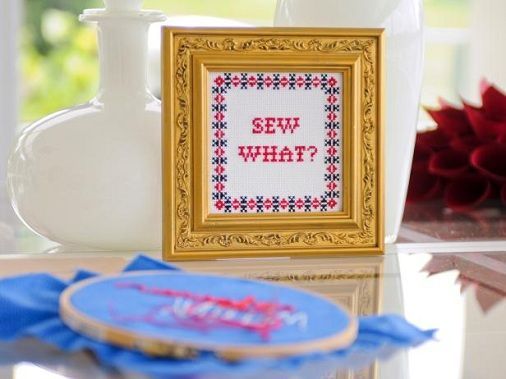
6. Designer Hand Made DIY Crafts:
If you’re feeling free at home what to make something good idea to decorate your home with the good ideas then see below are the diy crafts for home.

- First of all curs a piece of fabric along a bit large then the pattern with an atleast 8*10. Now find the approximate center of the design by the small black arrows to the edge of the pattern grid.
- Fold the paper both vertically and horizontally or mark the center with a pen. Then find the approximate center of the fabric by wrapping the same way and leaving a deep crease in the center.
- Remember that the stitches closest to the center and start with that color of floss. Now cut a strand that is roughly 18 to 20 inches long. Use only two strands at a time. This is super important. Otherwise, your stitching will be way too bulky.
- When you start it must layered out to stitch each X one at a time. When it becomes more comfortable, you can eventually work a row of half stitches (/ / / /).
- Each X crosses in the same direction.
- That is, the top thread of the X should always slant in the same direction.
- Select to secure the thread on the back with knots,
- Make sure they are very tiny for the object.
- Hand-wash it in cold water in the sink with a tiny touch of Woolite or very diluted detergent. Let it dry thoroughly then press it with lots of steam. Be careful not to scorch the final iron.
See More: Making Crafts Step By Step
7. Easy DIY Crafts for Girls:
Girls!!! diy arts and crafts ideas you want to make the tote bag which will easy to carry with a single book to your college then check below are few steps How to Make DIY Tote Bags.
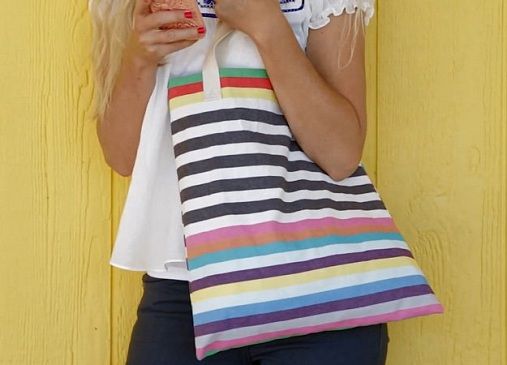
- Mainly take a half yard of fabric
- Take your rotary cutter and cut your fabric 16″ x 36″ and set it aside.
- Using a pair of scissors, cut two strips of twill tape, each of them 27 inches long (or 1.5 yards total for both). Make sure both handles are equal length.
- Sew down one side, around the bottom, and back up the other side of your fabric together with a half inch allowance.
- Iron the top edge less than half an inch and iron it under another inch. Then sew the hem in place.
- Pin the handle in place. Sew them onto the bag in a square, and then sew an “X” at the base of each handle.
- Just finished making a totally hip and cool tote bag which you feel to make the outfit.
8. Easy DIY Craft Ideas:
You are worried to make easy crafts with love. Since all the love was little crazy now check the easy diy craft Projects from the below-given steps.
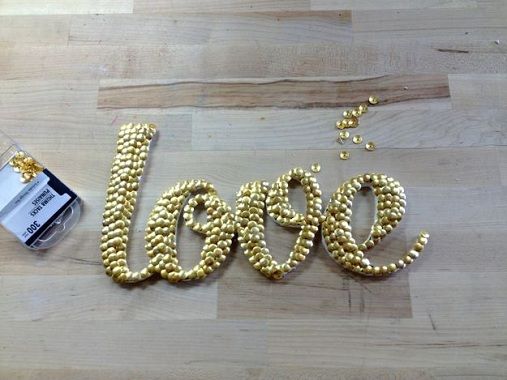
- Take one cardboard of Letter ‘Love”. Choose any Multi color you like sequin pins which are used push the pin into the cardboard. It’s effortless, but you’ll definitely need one! Cardboard letters – Then use 8″ size brush & paint in the same color as sequins.
- Now Paint your letters and let them dry. Pin the sequins on given letters. Space them as close as together or as far apart as which you would like to affect you desire.
- Finally, the closer together, the longer it will take. Note that the sequins on our L are closer together than the sequins one the Letter E.
- It is a straightforward project, but a little tedious. To make it easier this should Love to your made project.
See More: Crafts For Adults
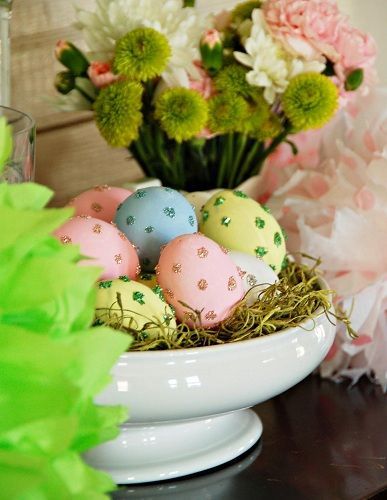
9. Decorating DIY Craft Project:
To make the special of the interior of our diy arts and crafts ideas which makes very special then check how to make Easy Easter Egg Decorating Ideas

- Blow out the interiors of each egg before decorating, then hand-paint with various shades of acrylic paint.
- Take the egg and proceed for the next level
- Once it dry, use a lbrush to make paint polka dots, swirls and or other designs with glue onto painted eggs.
- Sprinkle the,m with wet glue with glitter. At the last it will be a batch of glamorous and glittery eggs to display for spring guests.
The goal of any project for step according to the Diy Crafts should be very unique for own thoughts of making special of crafts & arts.
See More: Christmas Crafts For Kids and Adults
Images Source: 1, 2, 3, 4, 5, 6, 7, 8, 9.
