How to Make A Stylish Kurta Step By Step | Styles At Life
Kurta is the short version of the kurtis. When the length of the kurti is made short till the hips or above the knee, it is called as a kurta. Kurtas has become quite trendy these days from routine wear to party wear. With a personalized touch of neck designs, fabric, embroidery, sleeve designs, etc. they have given a new dressing sense to the fashion lovers. Through this article, every one can know how to make kurta in a simple and stylish way.
Contents
How To Make Kurta In An Easy Way, Step By Step:
Here are some techniques on how to make kurta that would surely help you get the best look.
1. Select The Correct Fabric:

The prime step towards making a kurta is to select the fabric, which is dependent on the occasion and the climate you would be wearing it in. You can either go for long, loose fitting and traditional dress, or tight, chic and short dress, whichever is suitable for you. For healthy women, going for light and thin materials like chiffon, georgette, chandelier lace, etc. would be the best. Fabric collection is the first step to make your kurta better for wear or sell.
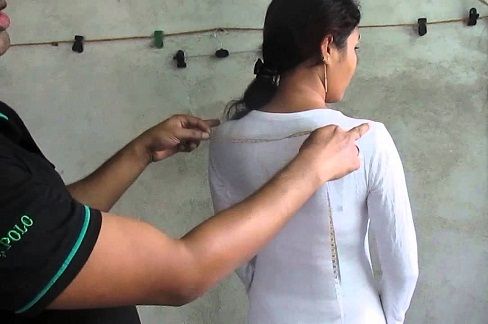
2. Take Measurements Of Body:

Take a piece of paper, and note down your measurements. The measurements include neckline width and diagonal, shoulder width, armhole circumference, upper and lower arm circumference, sleeve length, wrist, bust, waist, hip circumference, shoulder to bust length shoulder to hip length, kurta length, etc. Make sure your measurements are comfortable for you. If you are a heavy sized person then is sure about your all measurements properly, as per your kurta fabric get a few little high measurements to adjust later as per your comfort.
See More: Best Hand Work Kurti Designs
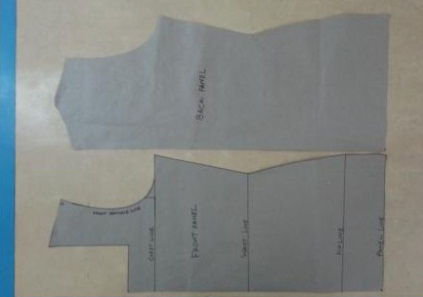
3. Select you Pattern for Front and Back:
Take a paper sheet and mark all the measurements on it. Make proper circles, and other straight lines, etc. on the paper taking proper measurements. While you make a designer kurti finally then take the final measurements for creating the neck pattern from the front and back. Fold the fabric in half and make the designs on it. This would give you proper cutting on both the sides with equal measures. You can take help of your partner or if you are planning to stitch for another one then it will go easy for you.
4. Cutting of The Fabric:
The next step in how to make designer kurtis is to cut the fabric according to the pattern you had designed on the paper sheet. Make sure you place the sheet properly in the center while cutting to give a perfect shape to both the front and back necklines. To cut any fabric you need correct clipper to save your time.
See More: Ready-Made Kurta Designs
5. Designing and Cutting the Sleeves:
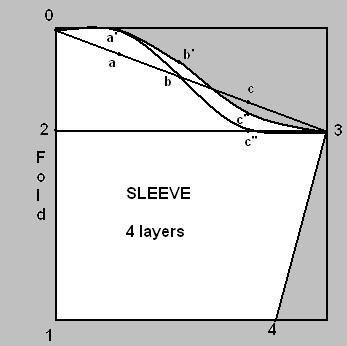
The next step in how to make kurti is the sleeves cutting. Just as you had taken the measurement of the dress, similarly, you need to take measurements for the sleeves and first design it on the paper sheet. However, while cutting the sleeves, the main thing to look after is the armhole. While cutting fold the fabric in half as you did for kurti front and back, and cut forming an alphabet S.
The final step in the process to make designer kurti is to assemble all the cut off parts that is the sleeves, neckline, dress, etc. Make sure you assemble them by folding them while working on neckline and sleeves to avoid double binding. Trim out the excess strips and finish the edges properly forming the best design ever. Also, make sure you leave a minor gap than the actual size to give proper fitting for the kurta.
See More: Party Wear Kurtis
Images Source: 1, 2, 3, 4, 5.
