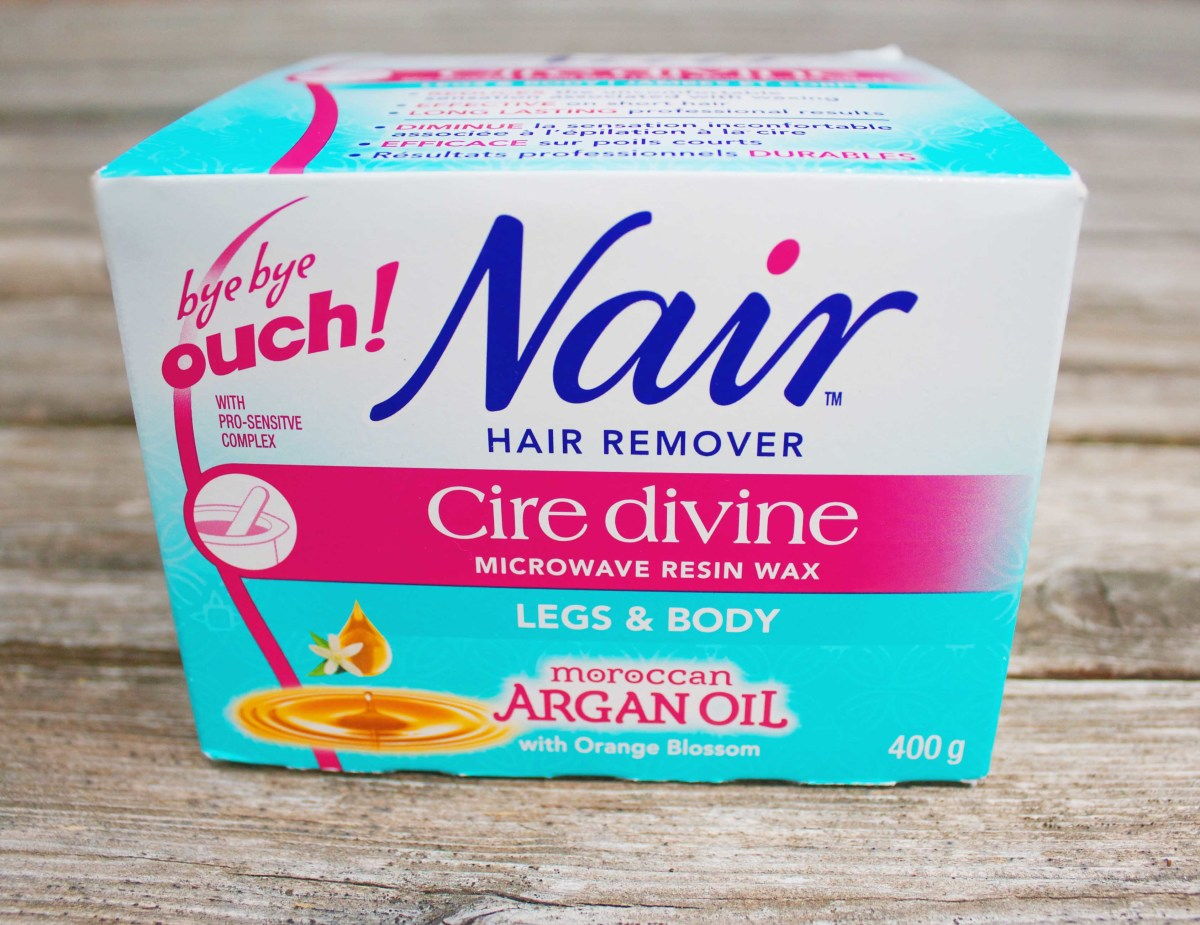
The Best No-Strip Wax For Easy Hair Removal At Home
The official start of summer is less than a month away, and you know what that means. Barbecues. Cottages. Bright lipsticks. Mini skirts. Oh yeah, and hair removal—eeks!
By this point, I've used everything from razors to epilators to depilatories to lasers in my quest for smooth, fuzz-free skin. I even had a brief stint getting regular salon waxes, until I realized that habit was costing me as much as my groceries.
But waxing at home? Tried it years ago, fiddled around with the strips, and broke off a bunch of hairs without removing them from the roots. It was such a failure, I figured waxing wasn't for me.
But then I test-drove Nair's new Cire Divine “Bye Bye Ouch!” Argan Oil Wax, and it changed EVERYTHING.
Now, I'm a total waxing convert, thanks to this easy, painless, no-strip waxing kit. Truth!
The reason it's so easy to use—working on hair as short as two millimetres—is because the formula firmly grips at the hairs closest to your skin, ensuring a full removal of the follicles right from the roots. No strips necessary.
It also contains a pro-sensitive complex with two percent zinc oxide. That means the wax won't adhere as much to your skin, further reducing the discomfort people usually associate with waxing.
The wax itself is resin-based, derived from pine trees, and is paraben-free. The addition of argan oil keeps it soft and non-sticky, so it washes away clean with just soap and water. And it's suitable for all skin types, even sensitive.
Here's what each box contains:
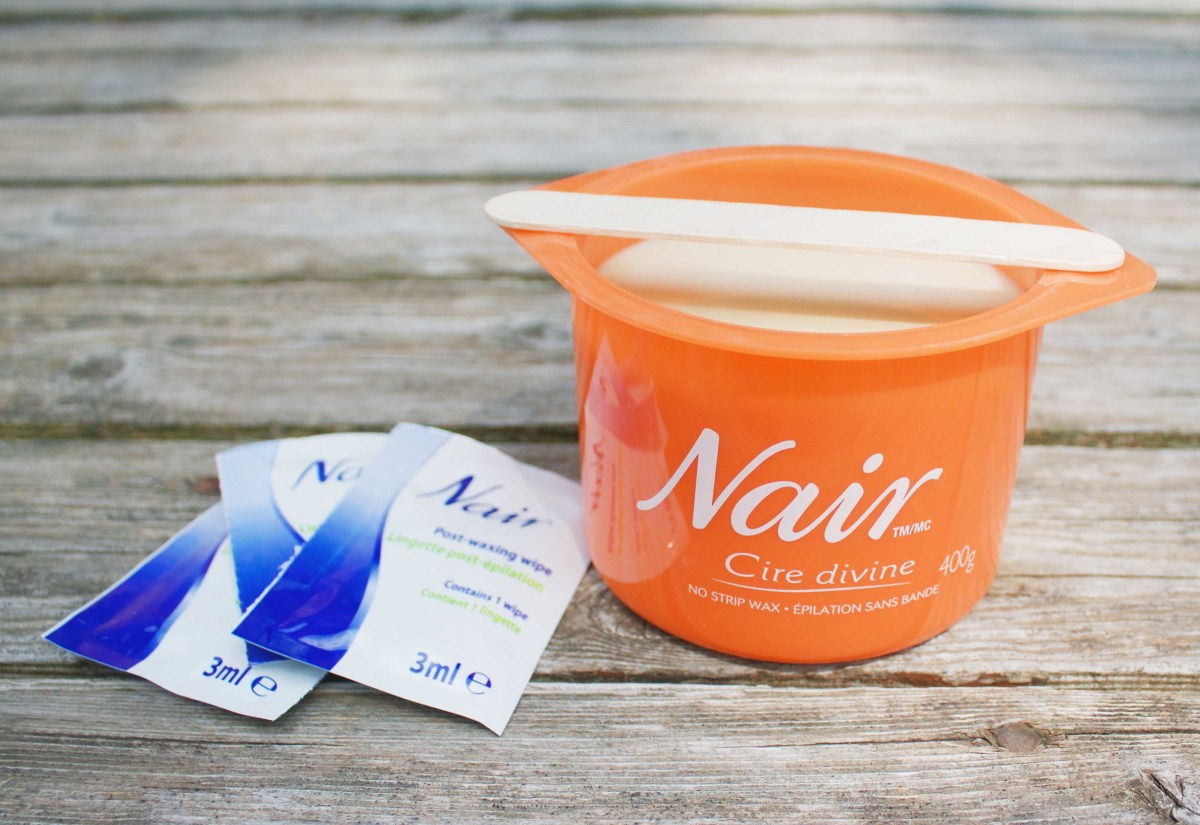
You get a really sizeable (400 gram) tub of microwaveable wax, along with a wooden spatula to apply it with. Then, three moisturizing towelettes to use post-wax.
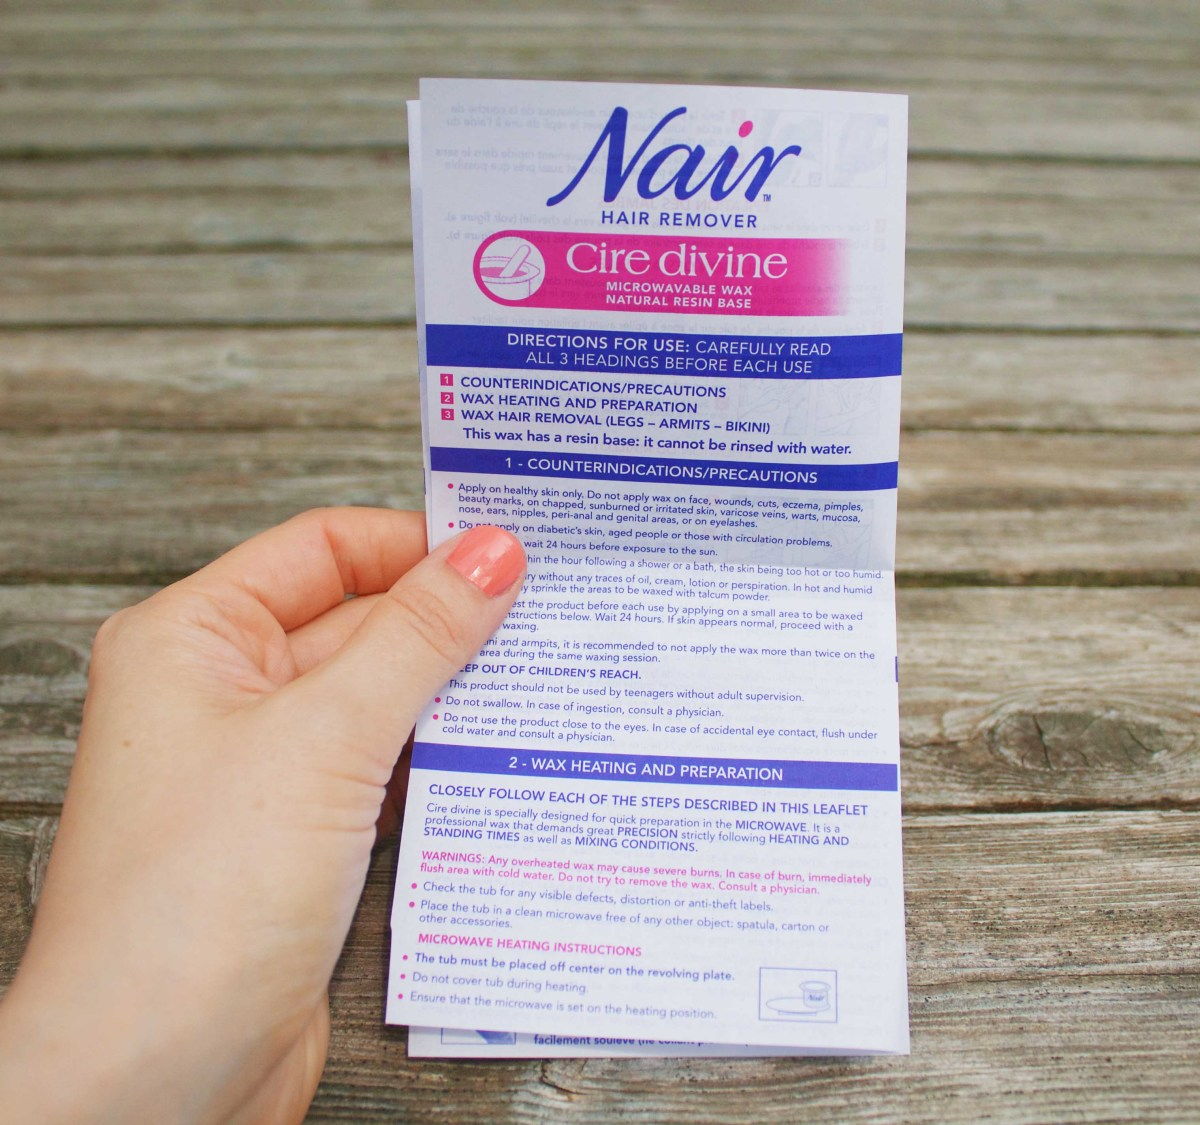
There are also detailed instructions explaining the process, so even newbies should feel confident.
Wanna see how it works, step-by-step? Allow me.
Before you start, you'll want to set yourself up in an area like a tiled bathroom, where it's easy to clean up any wax residue that might get on the floor. For the sake of good photos, I did this outside… but that depends on how comfortable you are with your neighbours!
It's a smart idea to do a patch test 24 hours before you wax over larger areas, to make sure you tolerate the product. Avoid waxing before sun exposure or right after a shower or bath, and only apply wax to healthy skin.
Contents
Step 1: Heat Up the Wax
You'll need a microwave for this, and they recommend 1 minute, 45 seconds for the full tub. Then you let it stand three minutes before stirring it with the wooden spatula.
Probably because our microwave is from the '80s, I found I needed more time to get the wax heated up enough. They say to keep nuking it in 10 second intervals, as many more times as needed, until it reaches the consistency of creamy honey.
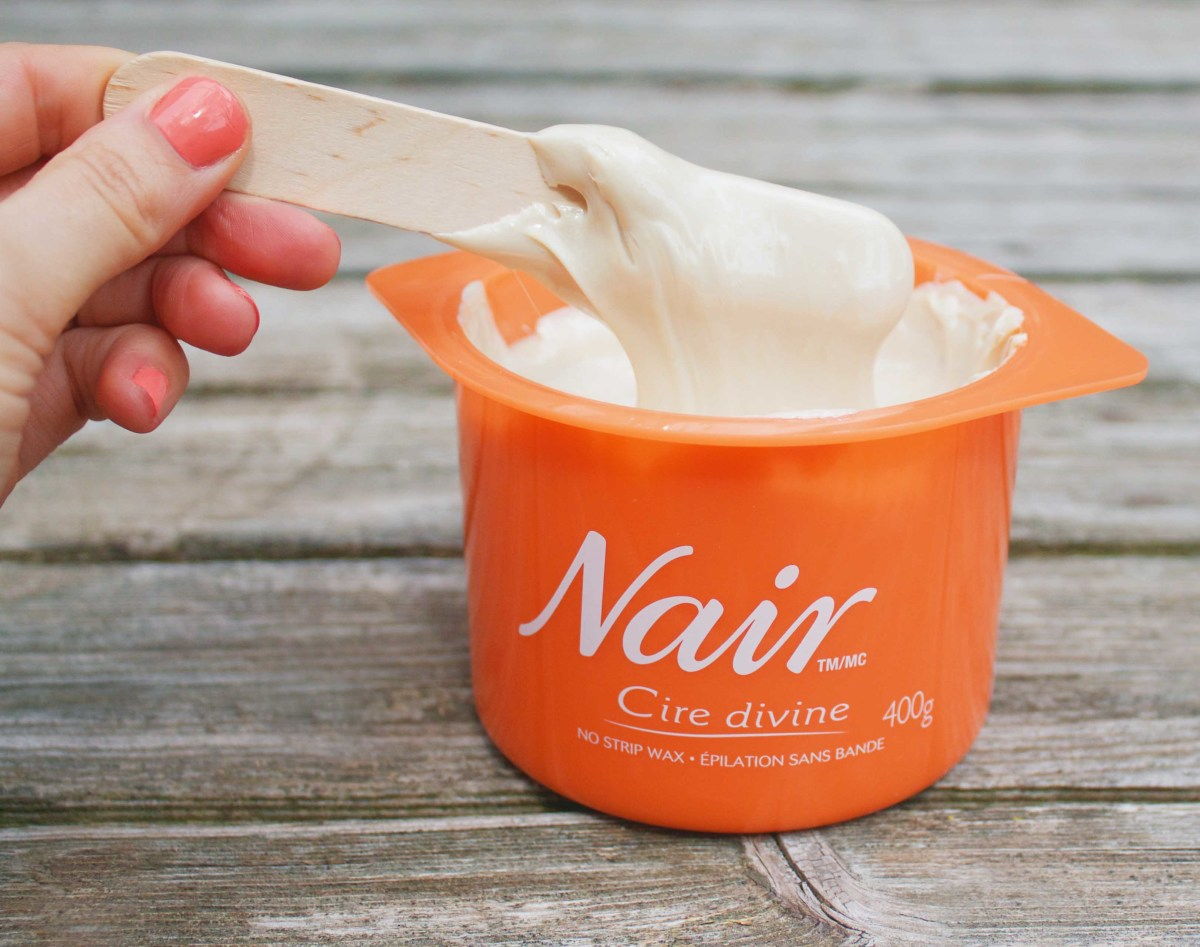
Once that happens, you stir it all up—and then you'll notice this amazing beachy, tropical scent. That's the orange blossom fragrance. (Nair, have you thought about selling perfume as well?! It's so good.)
Step 2: Apply the Wax
Now we come to the fun part. After checking that the temperature isn't too hot, get a nice knob of wax on the spatula and spread it on your body part of choice! (Not your face, of course—this wax is just for legs, armpits and bikini.)
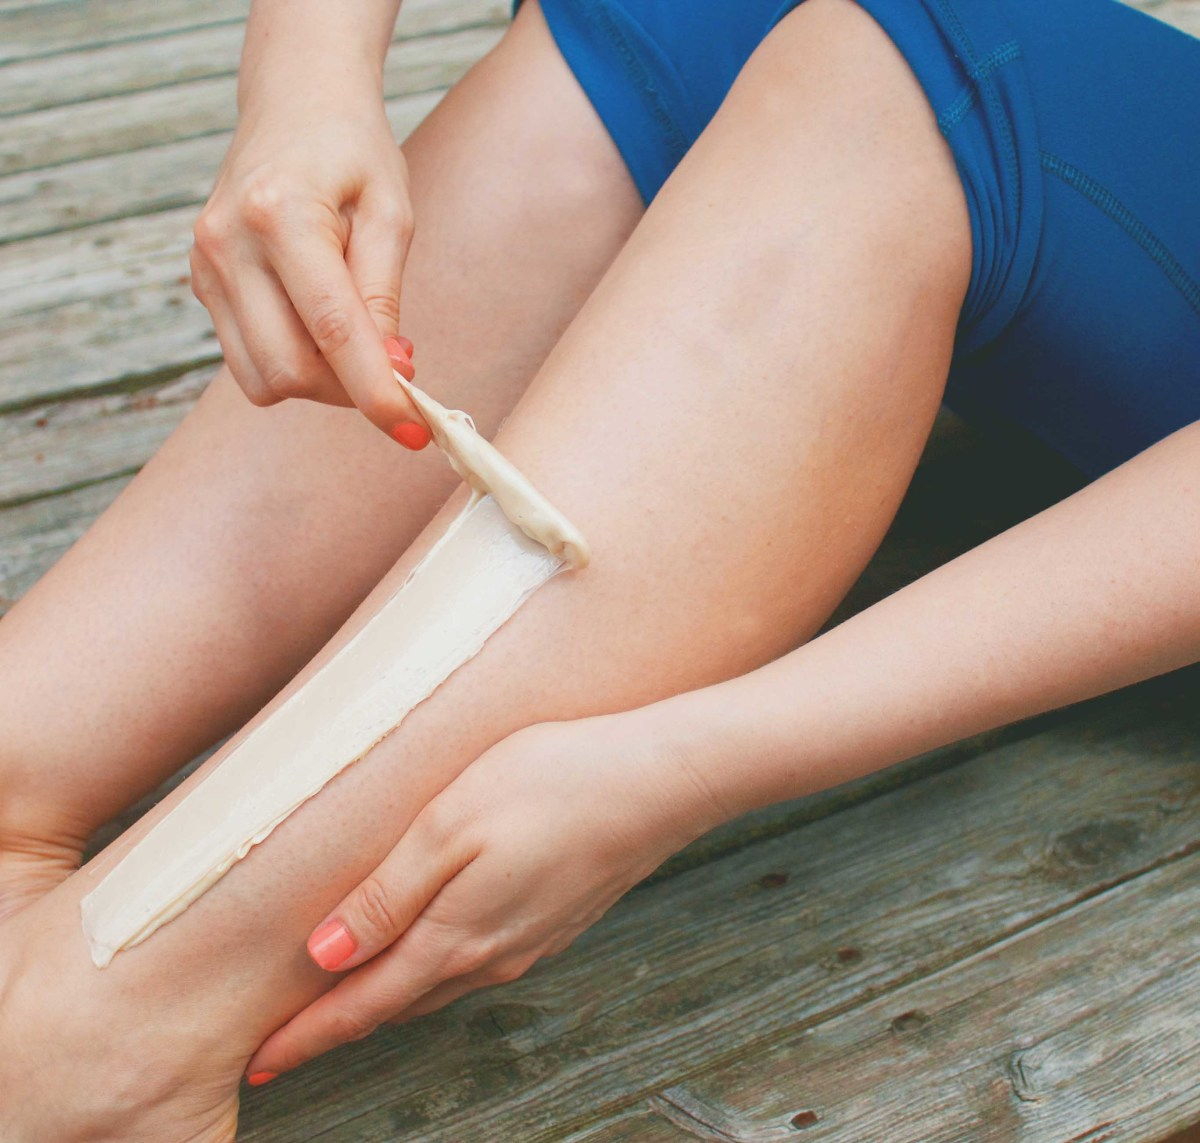
They say to apply a strip of wax in the direction of hair growth, with a thin layer of wax in the centre, about one to two millimetres thick, and thicker on the ends. For this first strip, I accidentally applied in the opposite direction of hair growth, and probably more thickly than I needed to. But you know what? It still worked just fine. This stuff is truly idiot-proof!
At the end of each layer of wax, create a little roll comme ça:
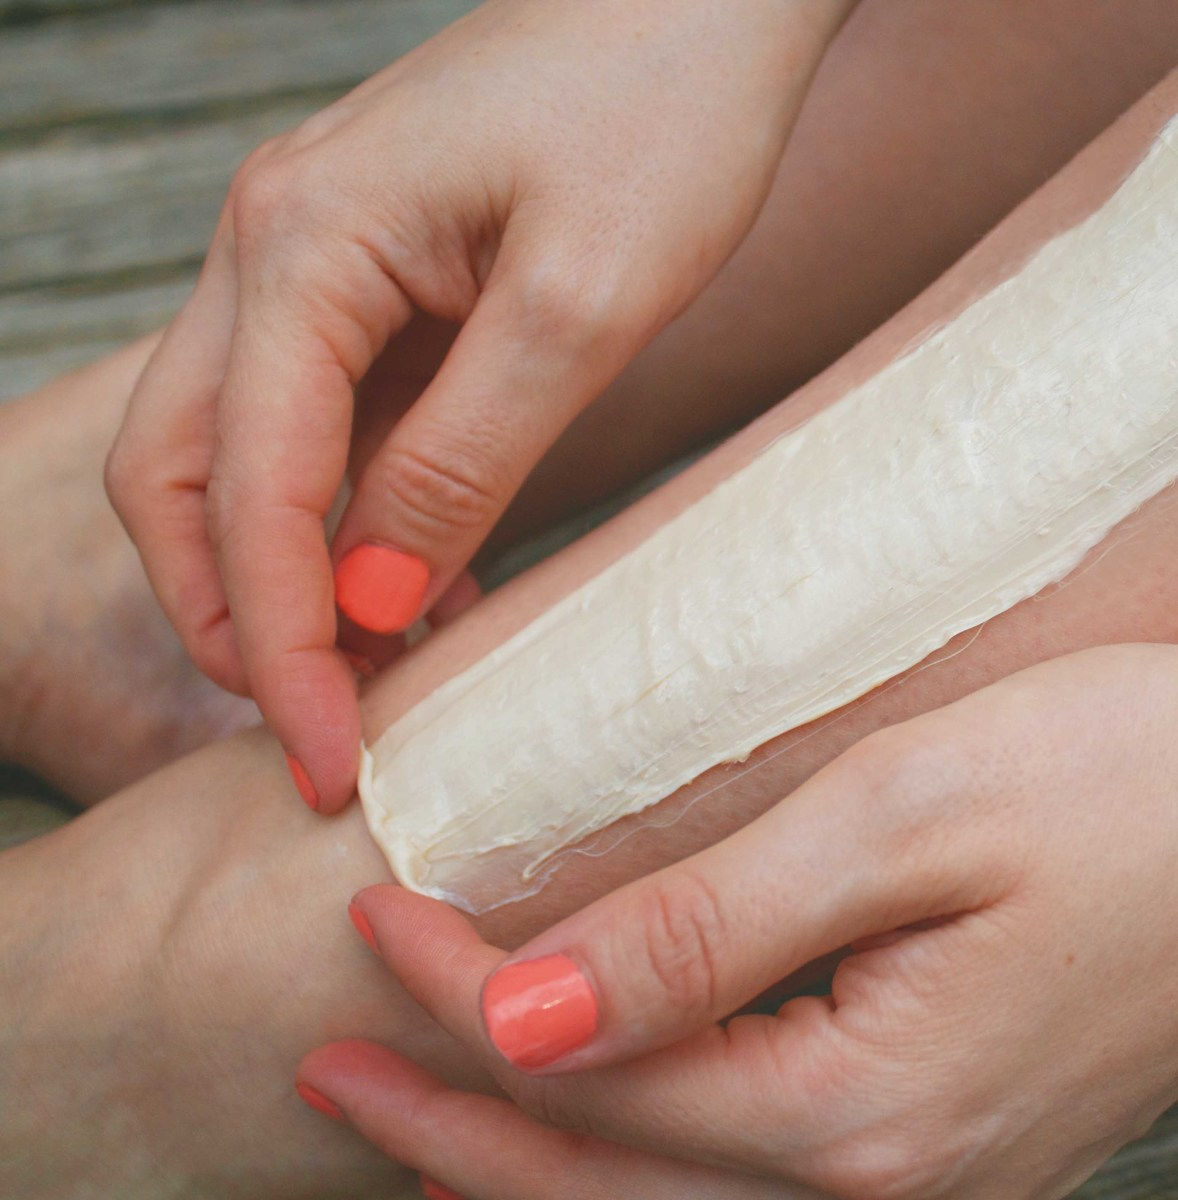
The roll will make removing the wax much easier. Now, all you need to do is wait a few moments, until it no longer feels sticky.
Step 3: Pull Off the Wax
Once the stickiness is gone and the wax is dry—which happens within a matter of seconds, really—you can pull it off.
Hold your skin taut with one hand at the top. With the other hand, remove the wax in a quick movement, in the opposite direction of hair growth. Pull from the roll and stay as close as possible to the waxed area.
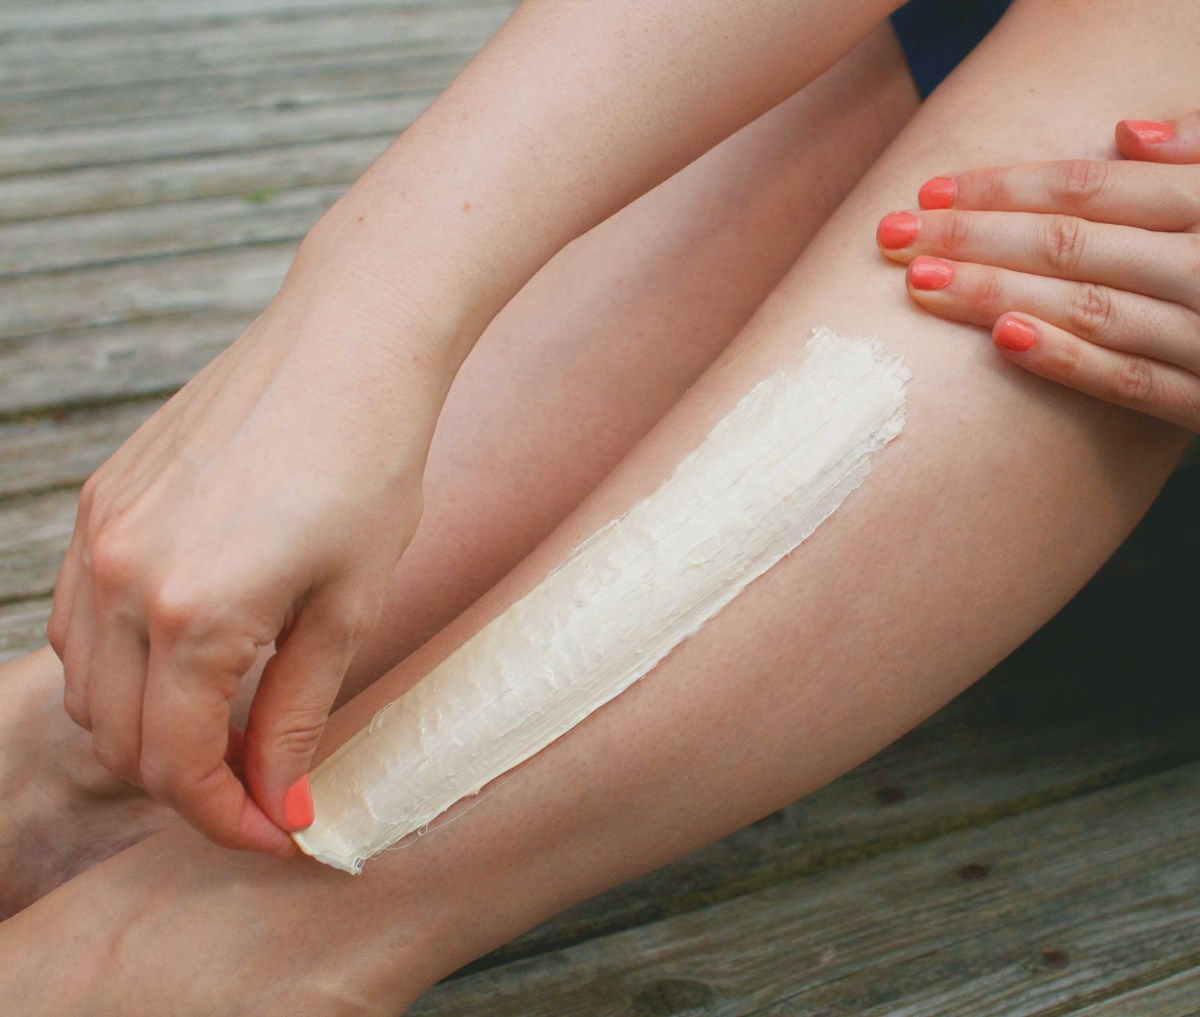
If all goes according to plan (and I can't think of why it won't), then you should be left with a smooth, hairless section and a wax strip full of little hairs. In all likelihood, you won't even feel any pain—I didn't!
Probably TMI, but I'll show you this anyway:
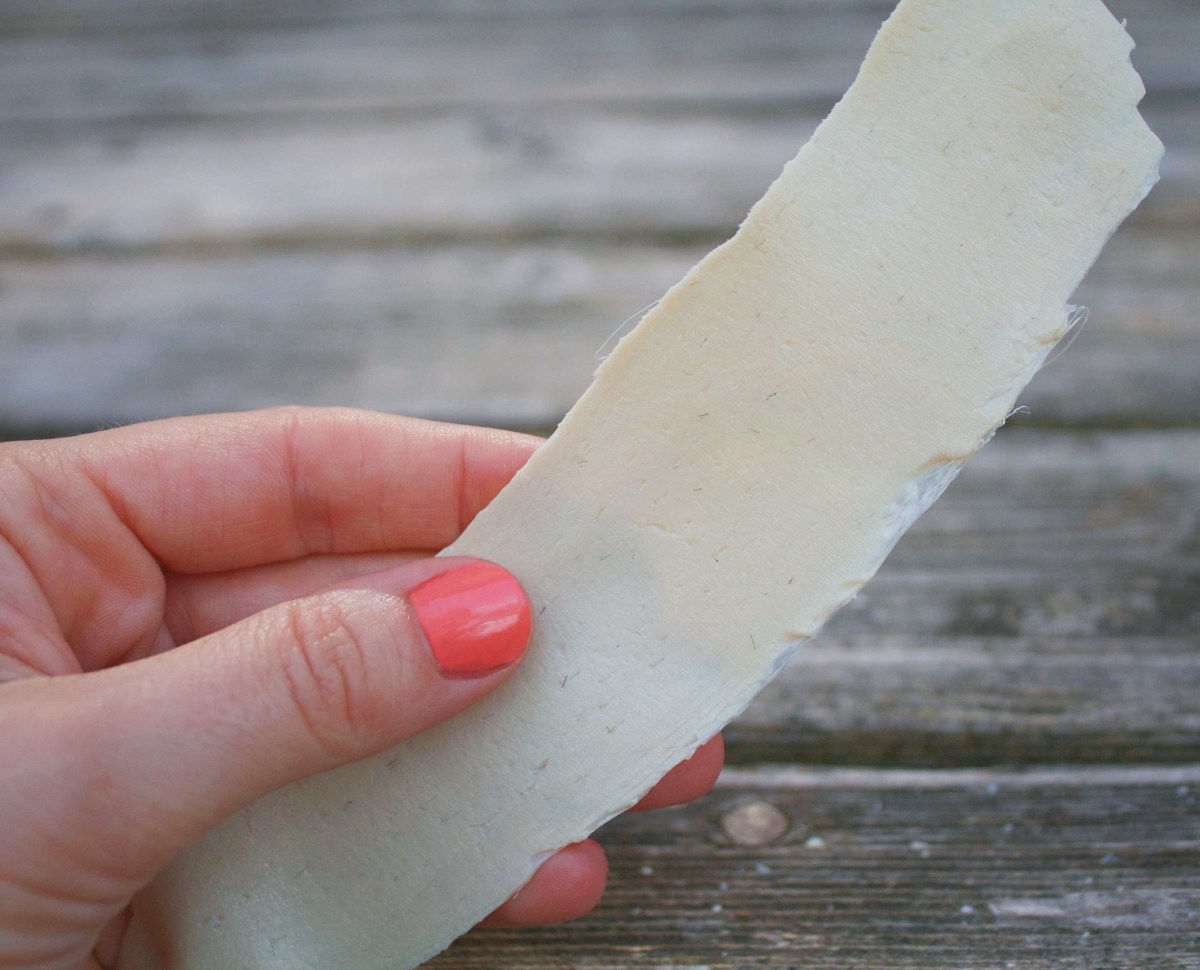
I've gotta say, I was absolutely amazed at this result. Who knew it could be so easy? Here I was before, thinking I wasn't able to use at-home wax because something was wrong with my technique. But nope. Now I know a successful home wax is all down to the wax formula itself—and this one is incredible.
Continue on, waxing section by section and re-heating the tub again if necessary. I just did my legs here, but one tub is said to be enough for legs, armpits and bikini area.
Step 4: Use the Moisturizing Towelette
Once you're done, use one of the moisturizing towelettes to soothe your skin and remove any leftover wax bits. (The wax is also washable, so soap and water works, too!)
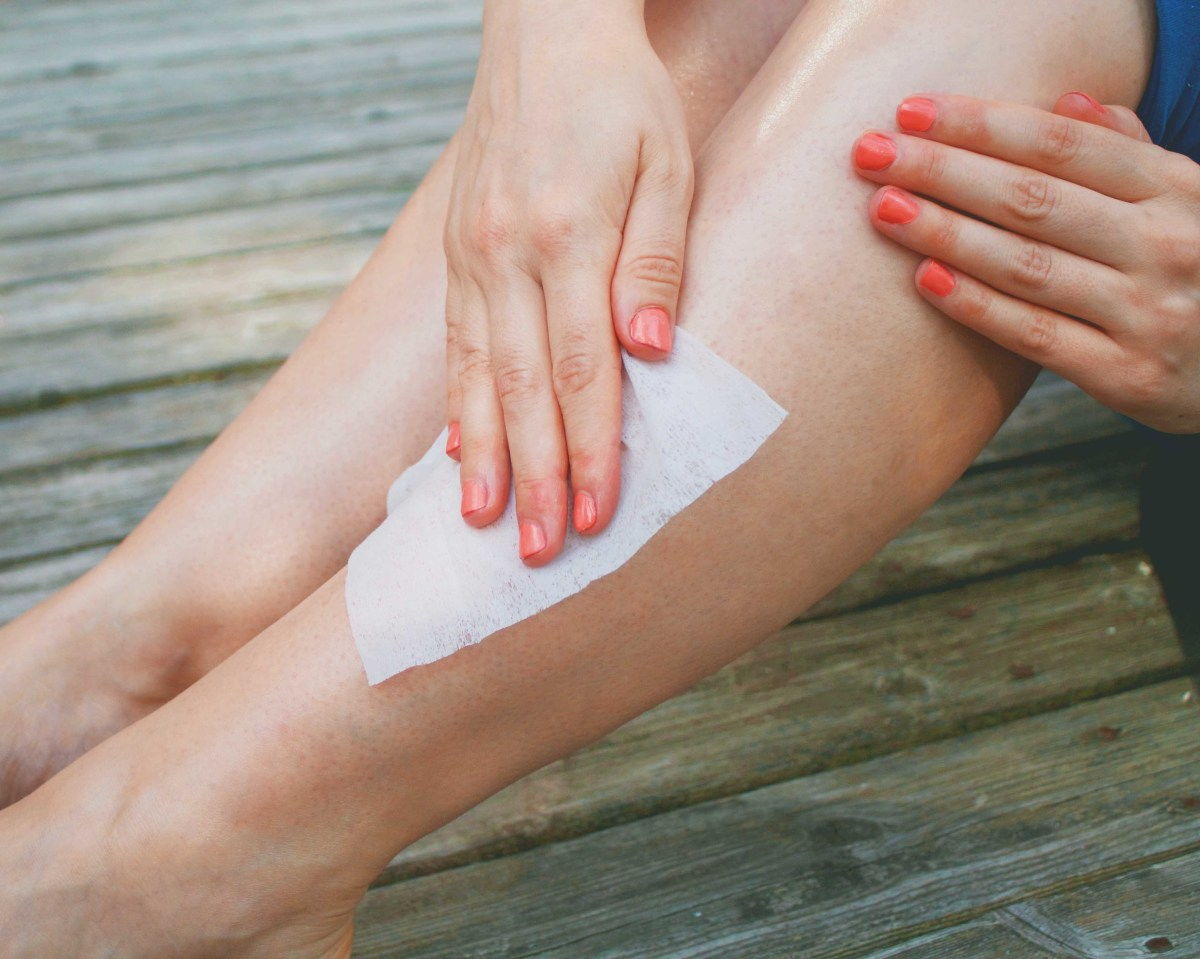
And that's it! Expect slight redness, which will go down within a few hours. Because the wax is enriched with argan oil, it's quite nourishing; between that and the towelette, your skin should feel nicely hydrated.
The Bottom Line
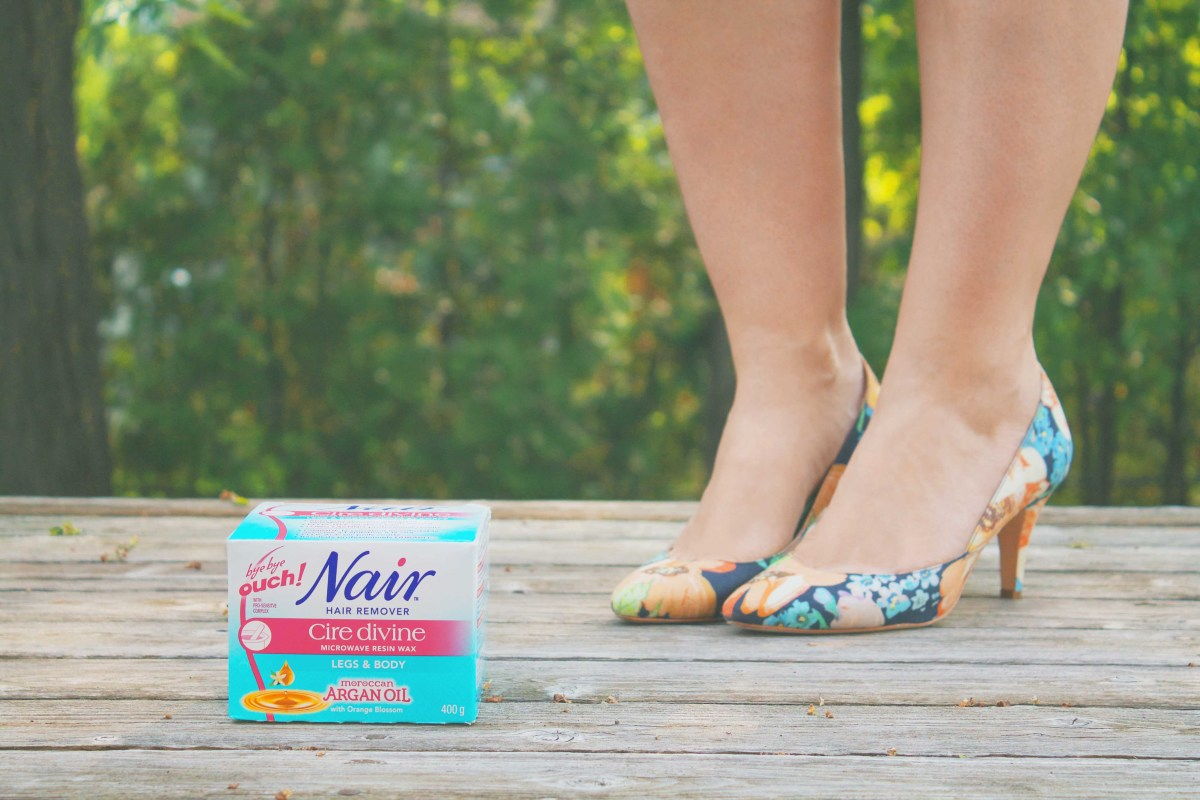
Can you tell I'm impressed? Nair Cire Divine “Bye-Bye Ouch” formula couldn't be a better choice for beginners—or any home waxer, for that matter. It's dead easy, utterly painless and works shockingly well to remove even short, two-millimetre hairs. And the results last up to four weeks.
At a fraction of the cost of a salon treatment, it has totally converted me to home waxing!
Where To Buy
Find Nair Cire Divine “Bye-Bye Ouch!” Argan Oil Wax now at drugstores and mass-market retailers across Canada.
Have Your Say
Do you wax your legs at home or the salon? Have you tried Nair Cire Divine?
