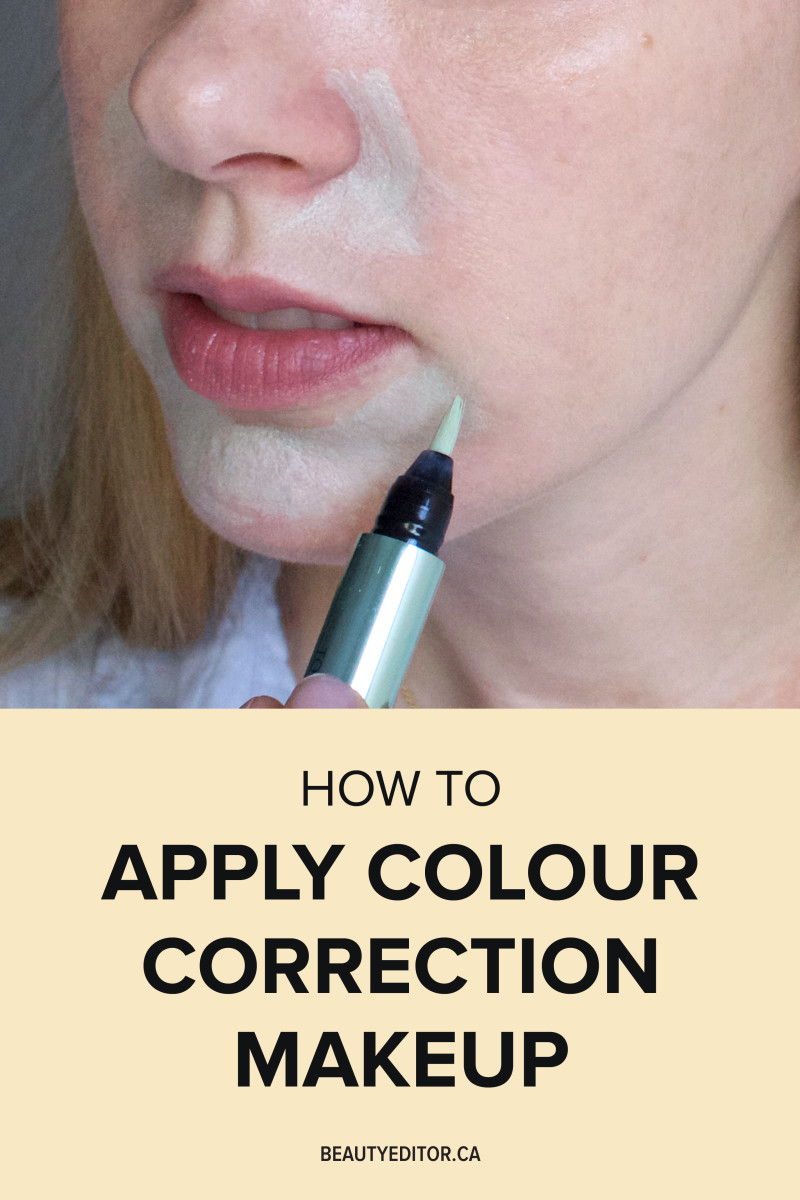
How to Apply Colour Correction Makeup
If you've looked at colour-correcting makeup before and decided it's not for you, I totally get it.
Those mysterious yellow, green, pink and peach tubes ARE intimidating.
And even if you understand the concept—that applying the opposite shade of the skin “problem” you want to correct will cancel it out—it's still more makeup to put on your face. As you know, I am the last person on earth who would ever recommend caking yourself up in layers of thick product. I want to see skin… real, natural, beautiful skin!
But here's the thing. If skin is indeed your focus (as it is mine), then colour-correcting is actually pretty genius.
I know, I never thought I'd say this. But there's a new crop of corrective products this year that I've been playing around with, and I am soooo impressed:

Unlike correctors of years past, these tints are super-sheer and the textures are lightweight. Instead of creating an obvious, mask-like effect, they subtly neutralize and brighten—so you can actually get away with LESS foundation and concealer (always the goal!).
Plus, if you're feeling a very skin-centric makeup look with minimal blush, eye and lip colour (like I am lately, and demonstrated here), colour correction is the ultimate tool to take your complexion to the next level. It will look that extra bit more perfected and luminous, not heavy.
I'm going to walk you through how to colour-correct four different concerns: dark circles, redness, dullness and dark spots. Depending on your skin and how much time you have, you might focus on just the area that bothers you the most—or do a full-face correction when you truly want to look your best. If I can do it, you can do it!
Contents
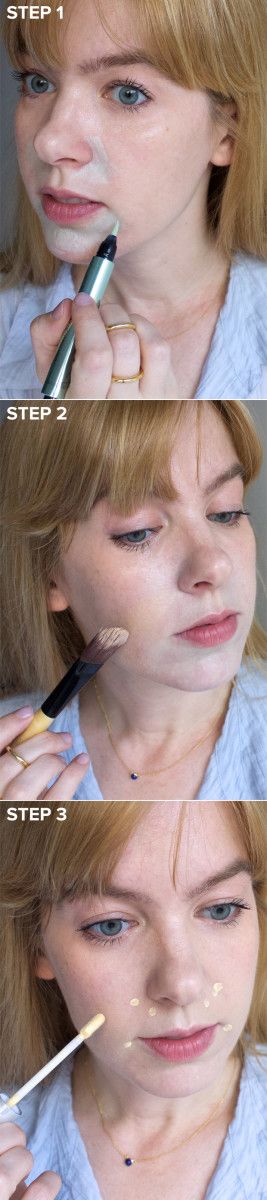
How to Correct Dark Circles
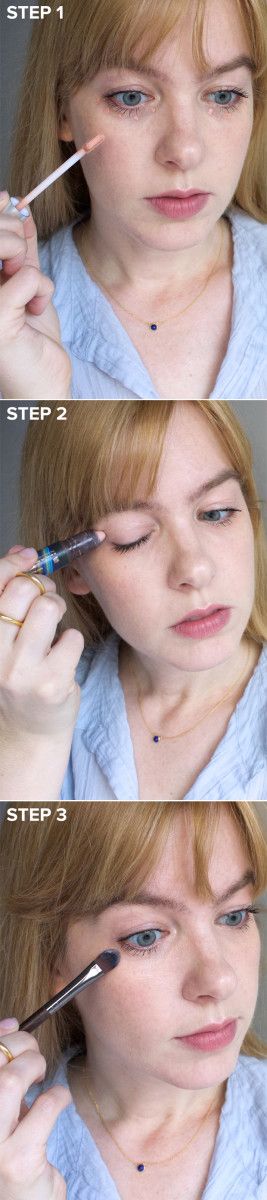
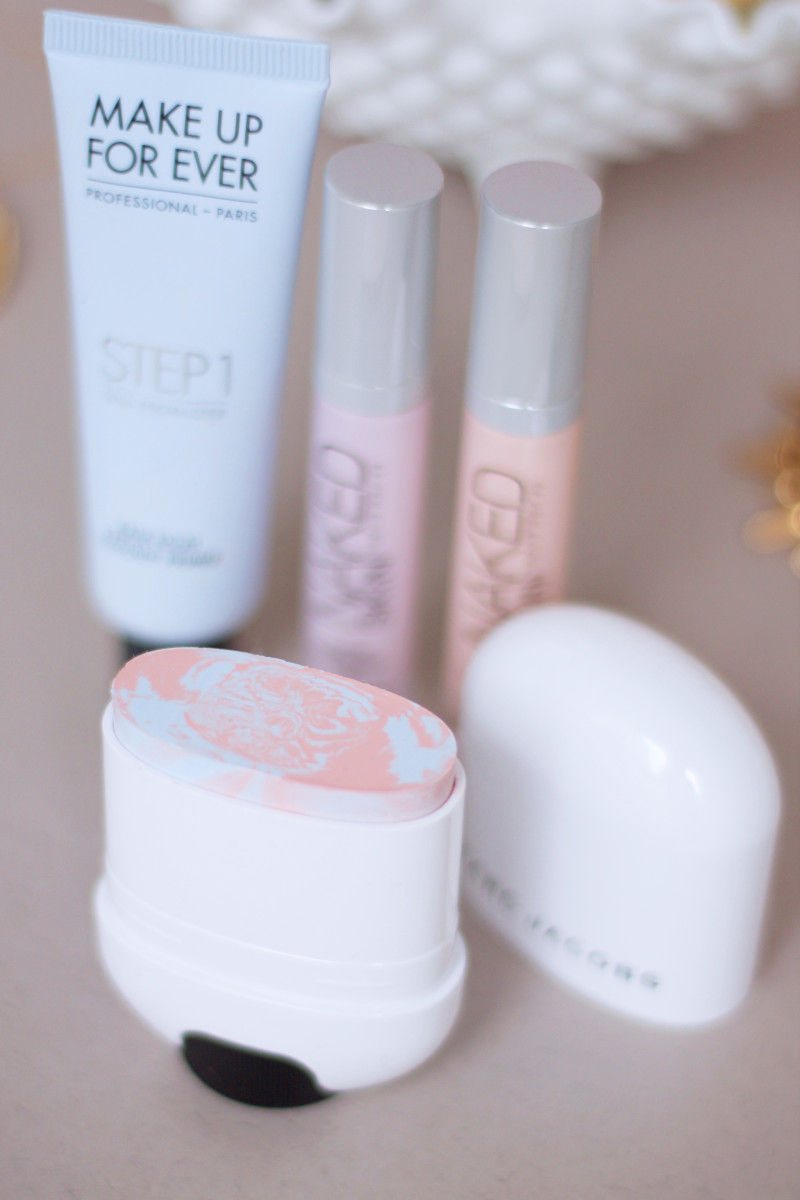
Step 1: Neutralize the shadows under your eyes with a colour corrector. I used Urban Decay Naked Skin Color Correcting Fluid in Peach (although Pink would've worked well, too). I really love this product—the texture and tints are perfect, and it's so easy to apply.
- If you have fair to light skin: Choose a pink corrector, such as Sephora Collection Bright Future Color Corrector in 03 Pink or Lancôme Miracle CC Cushion Color Correcting Primer in 03 Pinky Peach (applied with a brush).
- If you have light to medium skin: Choose a peach corrector, such as Bobbi Brown Retouching Face Pencil in Medium 7 or Urban Decay Naked Skin Color Correcting Fluid in Peach.
- If you have tan to dark skin: Choose an orange corrector, such as Giorgio Armani Master Corrector in 2 Orange or Marc Jacobs Cover(t) Stick Color Corrector in 320 Getting Warmer.
- If you have deep skin: Choose a red corrector, such as Becca Backlight Targeted Colour Corrector in Papaya or Cover FX Correct Click in Brick.
Step 2 (optional): For discolouration on your eyelids, consider a colour-correcting eye primer such as Tarte Colored Clay CC Eye Primer Stick. I like this one because it's a universal shade and waterproof.
Step 3: Finish up with a creamy concealer on top of your colour-corrected dark circles to create a seamless look to your eye area. I used Make Up For Ever Ultra HD Concealer in R30 (reviewed here).
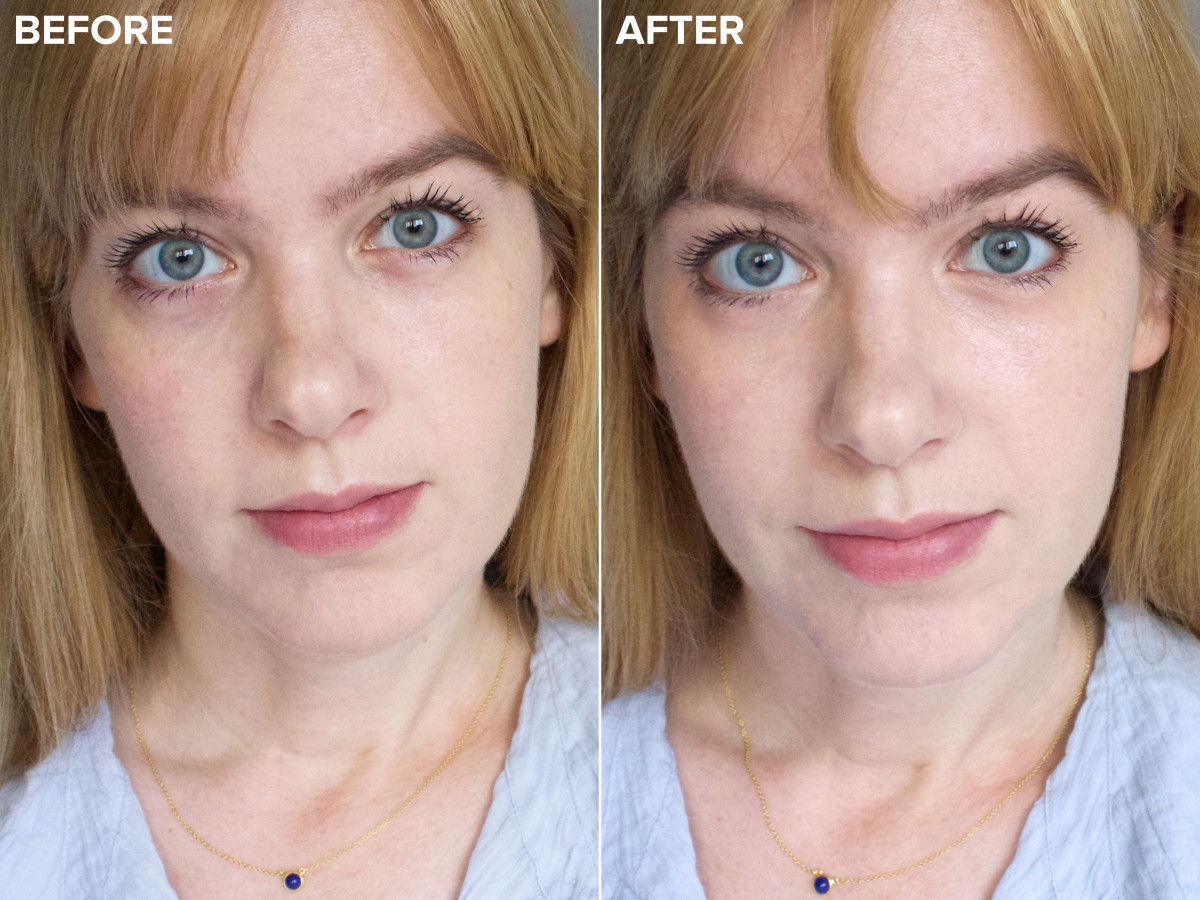
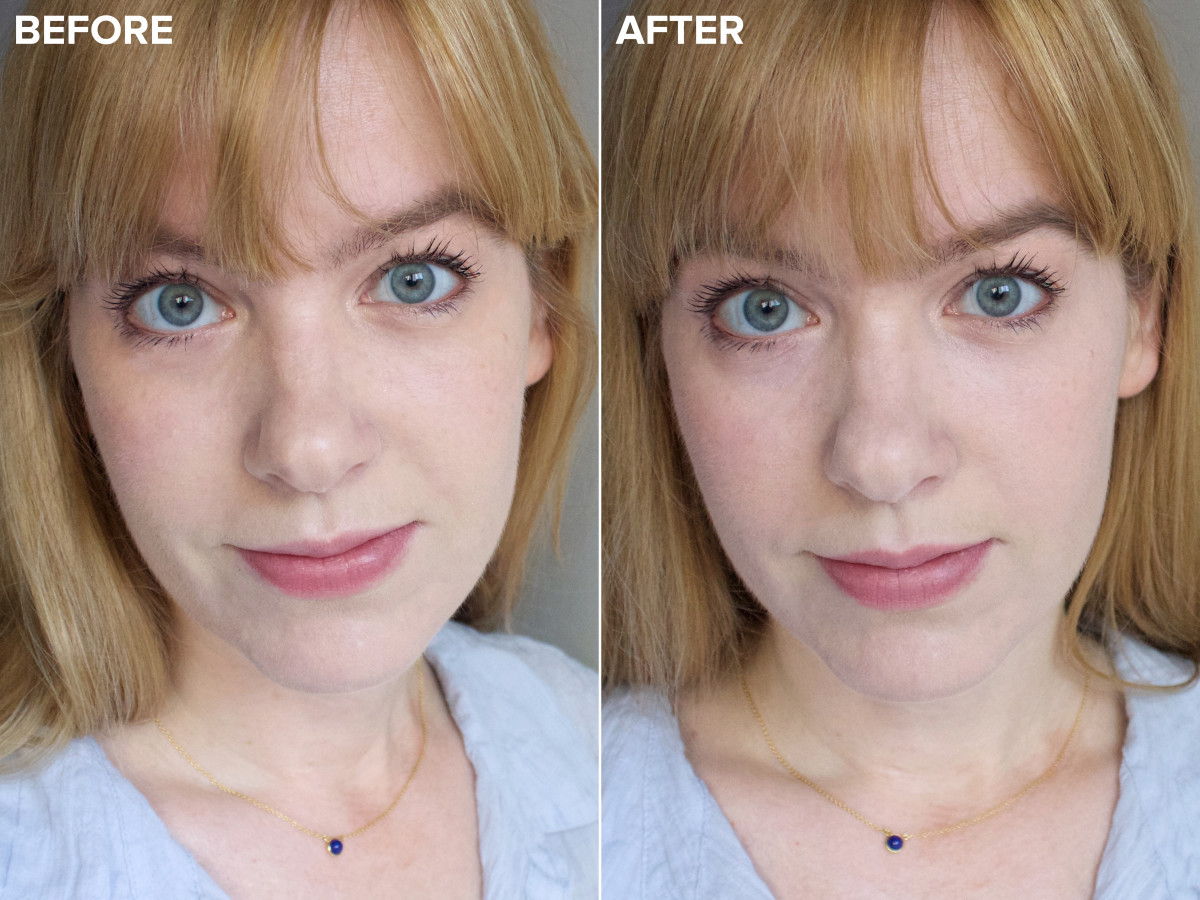
Here's my dark circle before and after. Not too shabby, right?
For more tips on correcting dark circles, Sephora has an amazing guide on their site right now—there's a video and product suggestions for various skin tones. Check it out!
How to Correct Redness
Step 1: A green colour corrector is your best bet to calm redness (no matter what your skin tone). I've already talked about the Make Up For Ever Step 1 Skin Equalizer Redness Correcting Primer in this review, and that's a good choice if you need all-over correction. Here, I chose the Yves Saint Laurent Touche Éclat Neutralizer in Green, which I might like even better. It allows you to be more targeted, but won't leave your skin with any greenish cast. If your redness is only mild, go for a yellow-toned primer or targeted corrector.
- If you have all-over intense redness: Choose a green primer, such as Make Up For Ever Step 1 Skin Equalizer Redness Correcting Primer or Lancôme Miracle CC Cushion Color Correcting Primer in 01 Green.
- If you have spots of intense redness: Choose a targeted green colour corrector, such as Yves Saint Laurent Touche Éclat Neutralizer in Green or Urban Decay Naked Skin Color Correcting Fluid in Green.
- If you have all-over mild redness: Choose a yellow primer, such as Make Up For Ever Step 1 Skin Equalizer Radiant Yellow Primer or Lancôme Miracle CC Cushion Color Correcting Primer in 04 Yellow.
- If you have spots of mild redness: Choose a targeted yellow colour corrector, such as Sephora Collection Bright Future Color Corrector in 02 Yellow or Urban Decay Naked Skin Color Correcting Fluid in Yellow.
Step 2: Go over the green or yellow with your usual foundation. I am wearing Make Up For Ever Ultra HD Invisible Cover Foundation in Y235 Ivory Beige.
Step 3 (optional): After foundation, I sometimes find I need a little somethin'-somethin' on any remaining areas of redness/darkness, such as around my nose and the corners of my mouth. The Urban Decay Naked Skin Color Correcting Fluid in Yellow is my favourite shade and ideal for this job—really makes you pop!
Here's my redness before and after. All the red is neutralized… without looking green or like I caked on layers of foundation.
Sephora's got tips, a video and more product recommendations in this dedicated guide to redness correction. If you want to cover up red acne spots, there's a great how-to in that video.
How to Correct Dullness
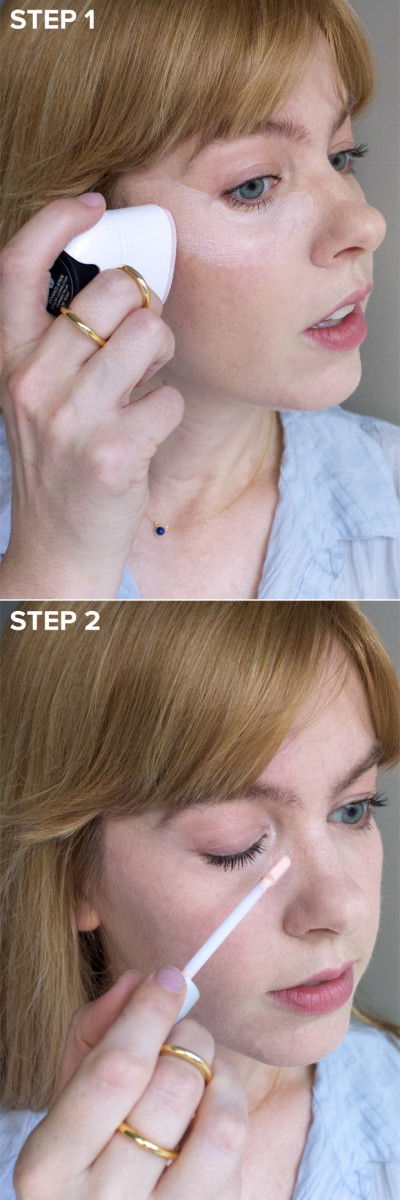
Step 1: If your complexion seems dull and sallow, apply a pink, purple or blue primer for an all-over brightening effect. However, avoid all-over cool tones if you have dark skin (you'll look ashy) or if you have skin with neutral-to-pink undertones, like moi. Instead, I chose to concentrate the brightening around my eyes only, using Marc Jacobs Cover(t) Stick Color Corrector in 310 Bright Now. I love that you can sweep this product right to your temples to catch the light and add a soft-focus luminosity.
- If you have light skin: Choose a pink corrector, such as Urban Decay Naked Skin Color Correcting Fluid in Pink or Algenist Reveal Concentrated Color Correcting Drops in Pink.
- If you have medium skin: Choose a purple or blue corrector, such as Urban Decay Naked Skin Color Correcting Fluid in Lavender or Make Up For Ever Step 1 Skin Equalizer Radiant Blue Primer.
- If you have dark skin: Pinks and purples can make you look ashy, so add warmth with golden and caramel correctors, such as Make Up For Ever Step 1 Skin Equalizer Radiant Caramel Primer.
Step 2 (optional): I added a dab of Urban Decay Naked Skin Color Correcting Fluid in Pink at the inner corner of each eye to take the brightening effect even further.
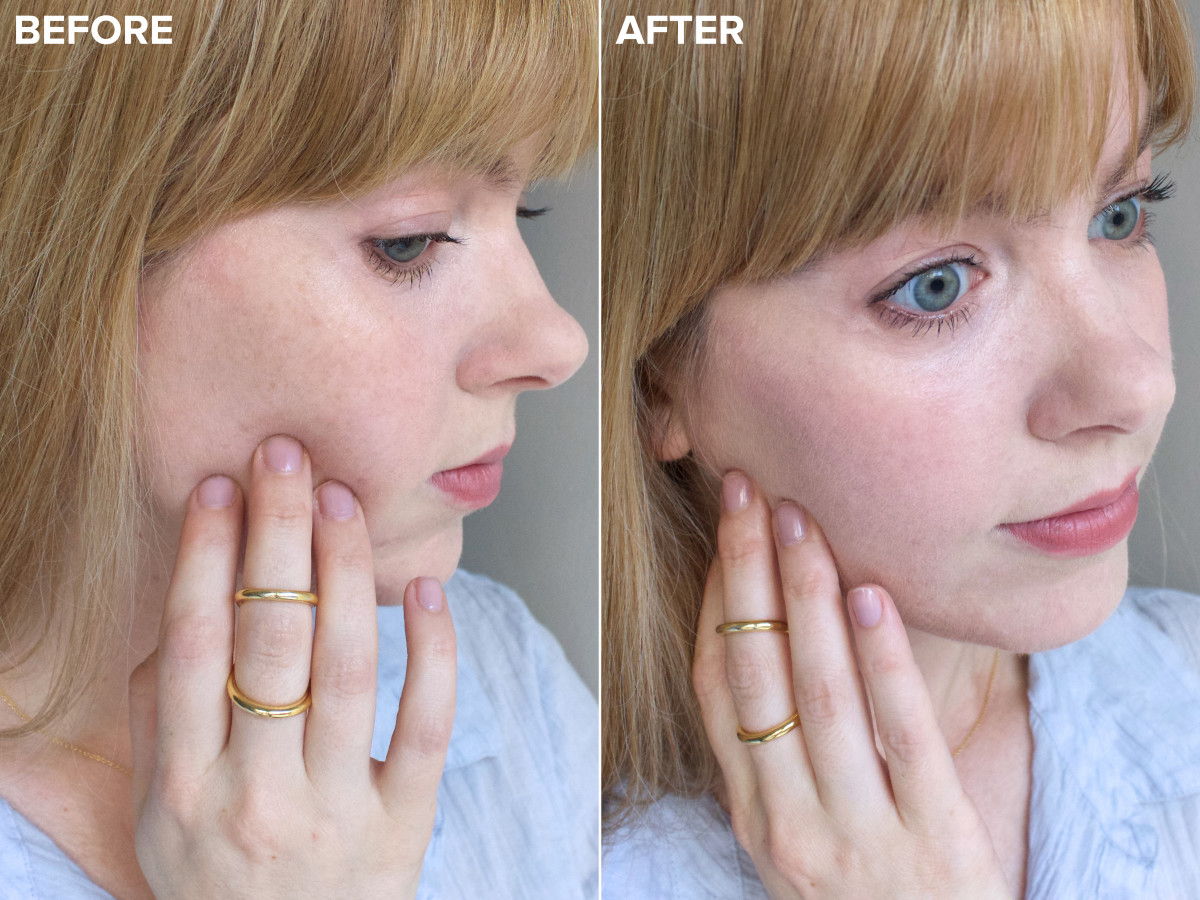
Here's my brightening before and after. It's a subtle difference, but a brand new way for me to highlight my eye area without resorting to shimmery highlighter. I love how the products push my temples and upper cheeks forward. Magic!
There is a whole section on Sephora's website right now covering dullness/brightening, including products picks, tips and a video.
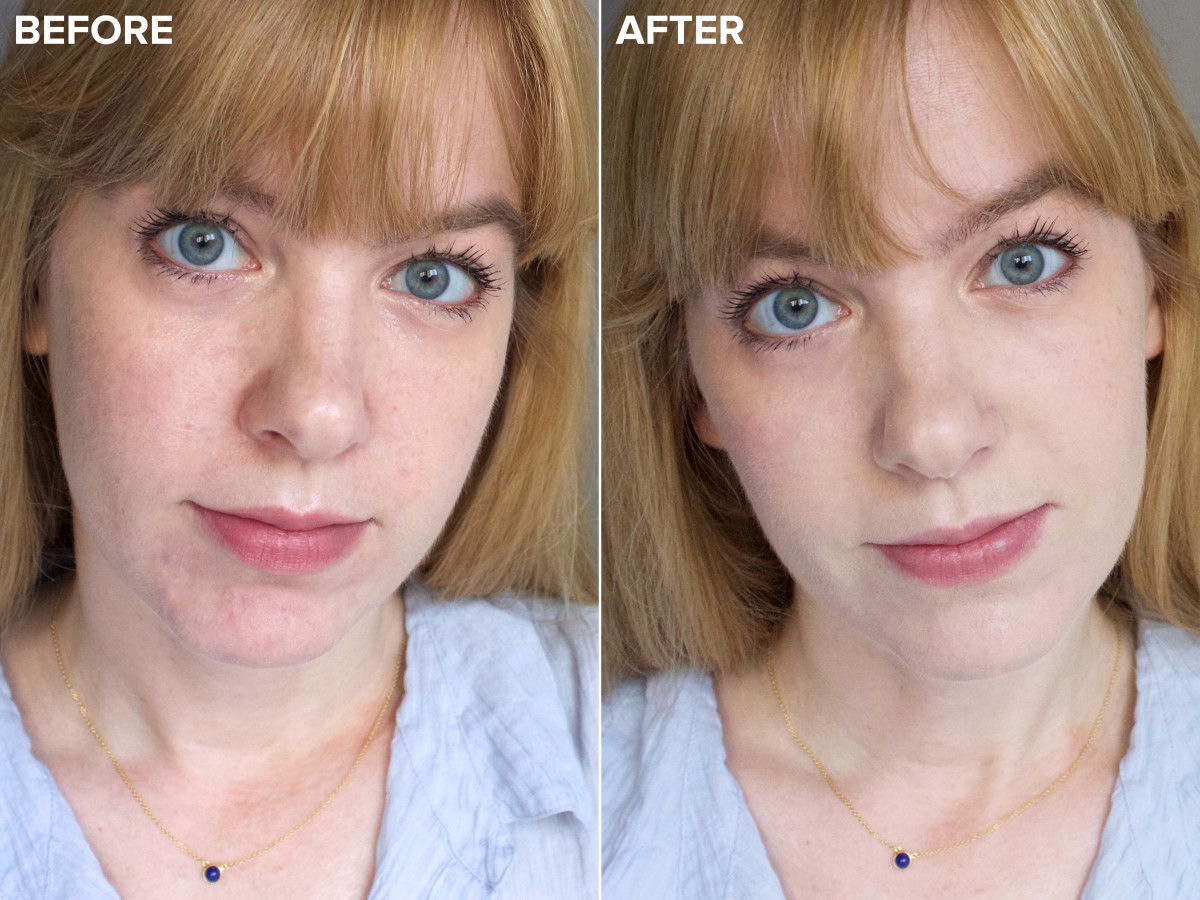
How to Correct Dark Spots
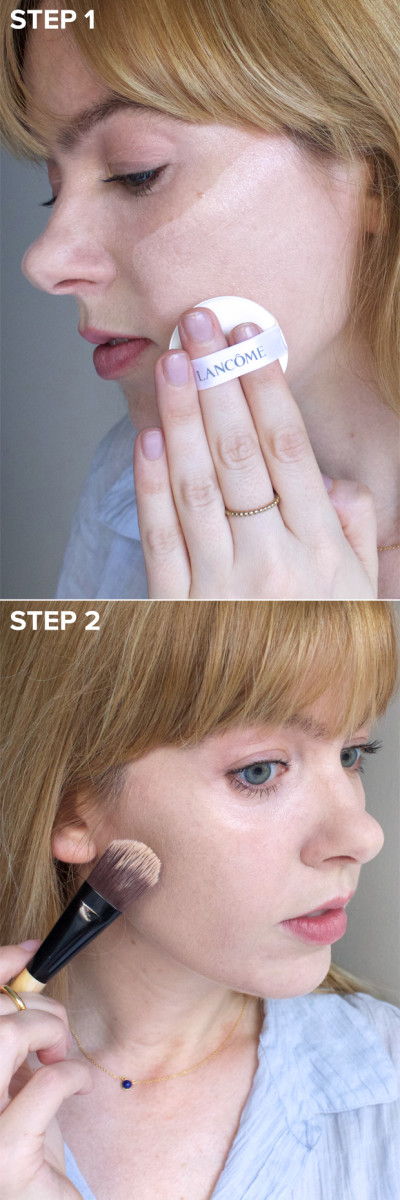
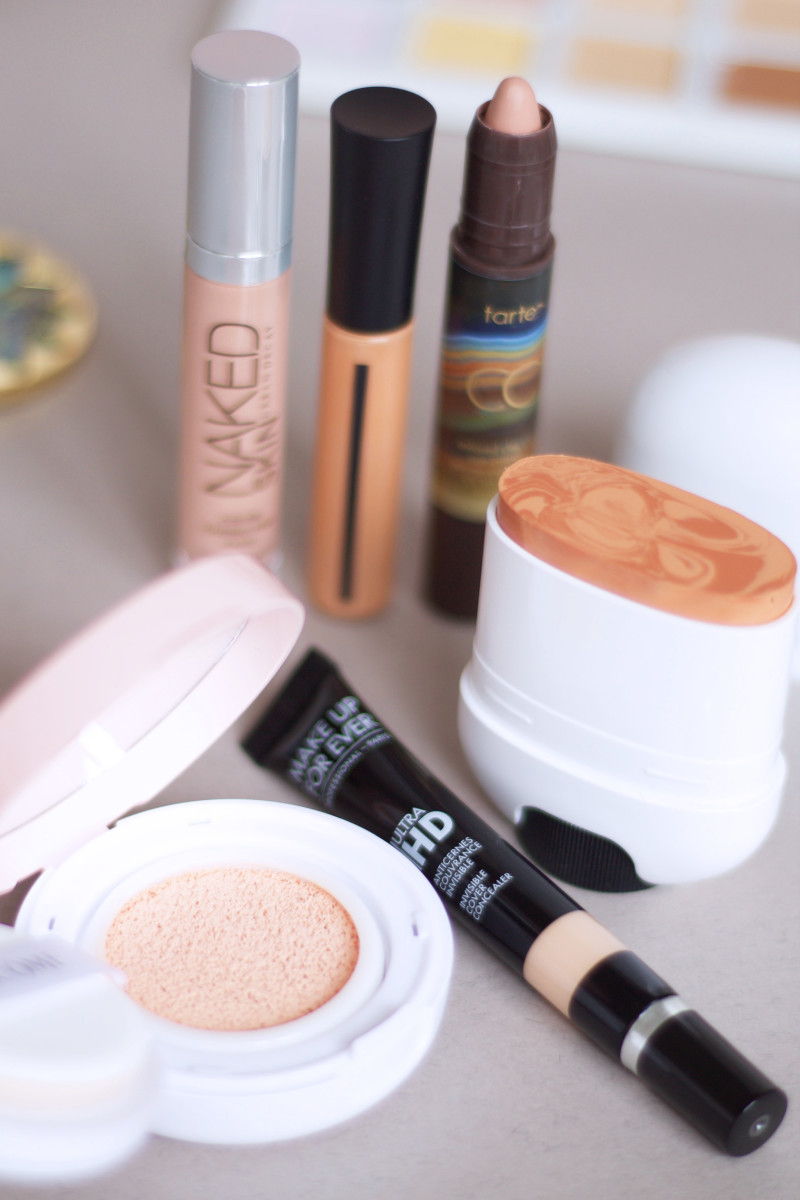
Step 1: Even out discolourations, hyperpigmentation or melasma with a colour corrector. I have some not-so-cute freckles on the sides of my face, so I covered them with a swipe of Lancôme Miracle CC Cushion Color Correcting Primer in 03 Pinky Peach on each cheek. For darker marks (such as post-acne marks), apply your foundation first, and then touch-up the individual spots with colour corrector.
- If you have light skin: Choose a pink corrector, such as Bobbi Brown Retouching Face Pencil in Light 9 or Lancôme Miracle CC Cushion Color Correcting Primer in 03 Pinky Peach.
- If you have medium skin: Choose a peach corrector, such as Amazing Cosmetics AmazingConcealer Corrector in Light/Medium or Urban Decay Naked Skin Color Correcting Fluid in Peach.
- If you have dark skin: Choose an orange corrector, such as Smashbox Color Correcting Stick in Look Less Tired (Dark) or Marc Jacobs Cover(t) Stick Color Corrector in 320 Getting Warmer.
Step 2: Apply your foundation on top of the colour corrector and the rest of your face (again, I used Make Up For Ever Ultra HD Invisible Cover Foundation in Y235 Ivory Beige). If you already put the corrector over foundation, you should now put concealer on top, applied with a tiny brush. Set with powder.
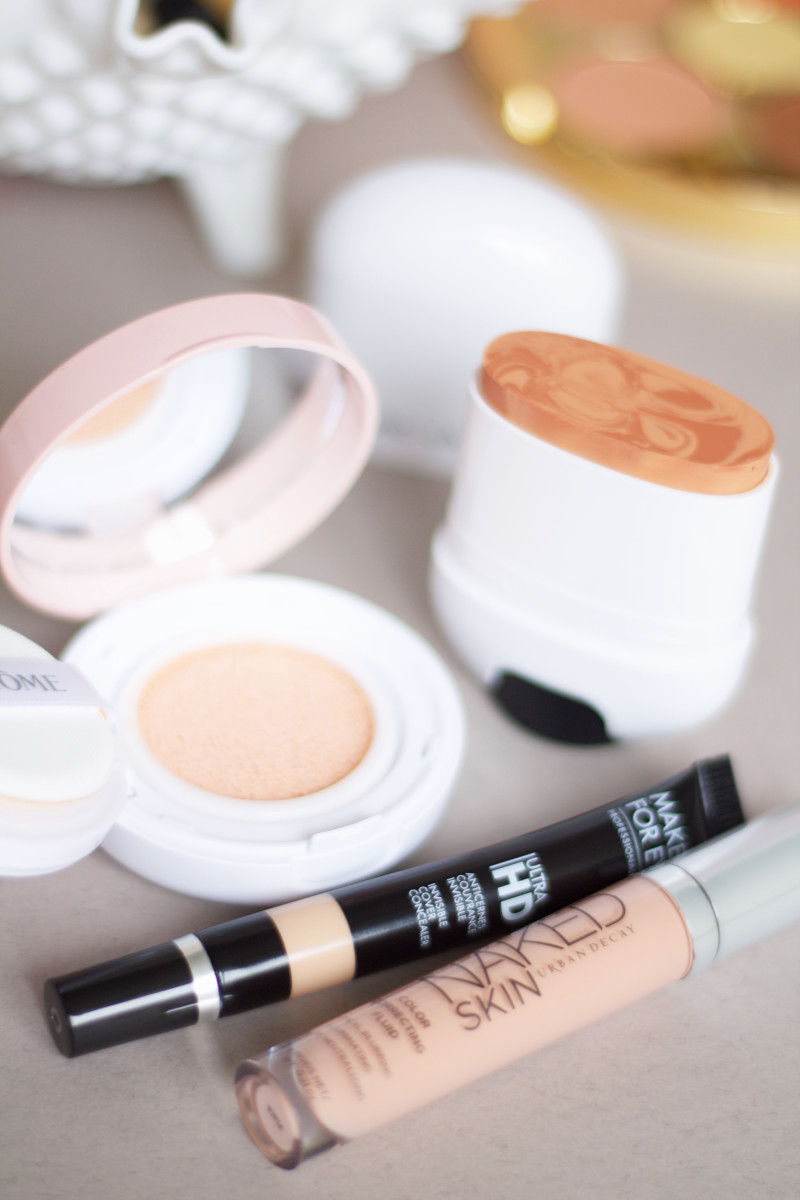
Colour-correct dark spots with products from Lancôme, Marc Jacobs, Urban Decay and Make Up For Ever.
Here's my dark spots before and after. They're a little more faded and I like that the corrector took out the yellow tone, so my cheeks look more luminous. (I added a little blush, too.)
Head to Sephora for yet another colour correction guide and product recos; I think their dark spots video has some super-helpful tips!
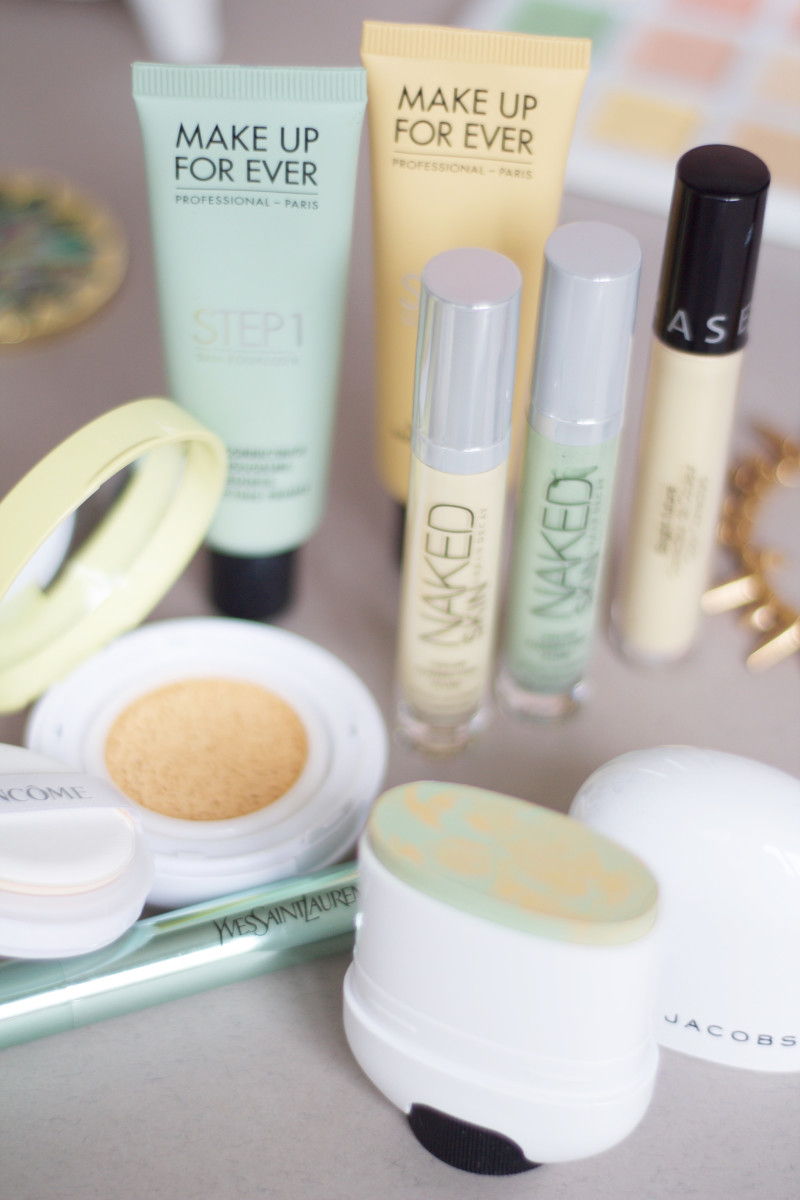
All-in-One Colour Correcting Palettes
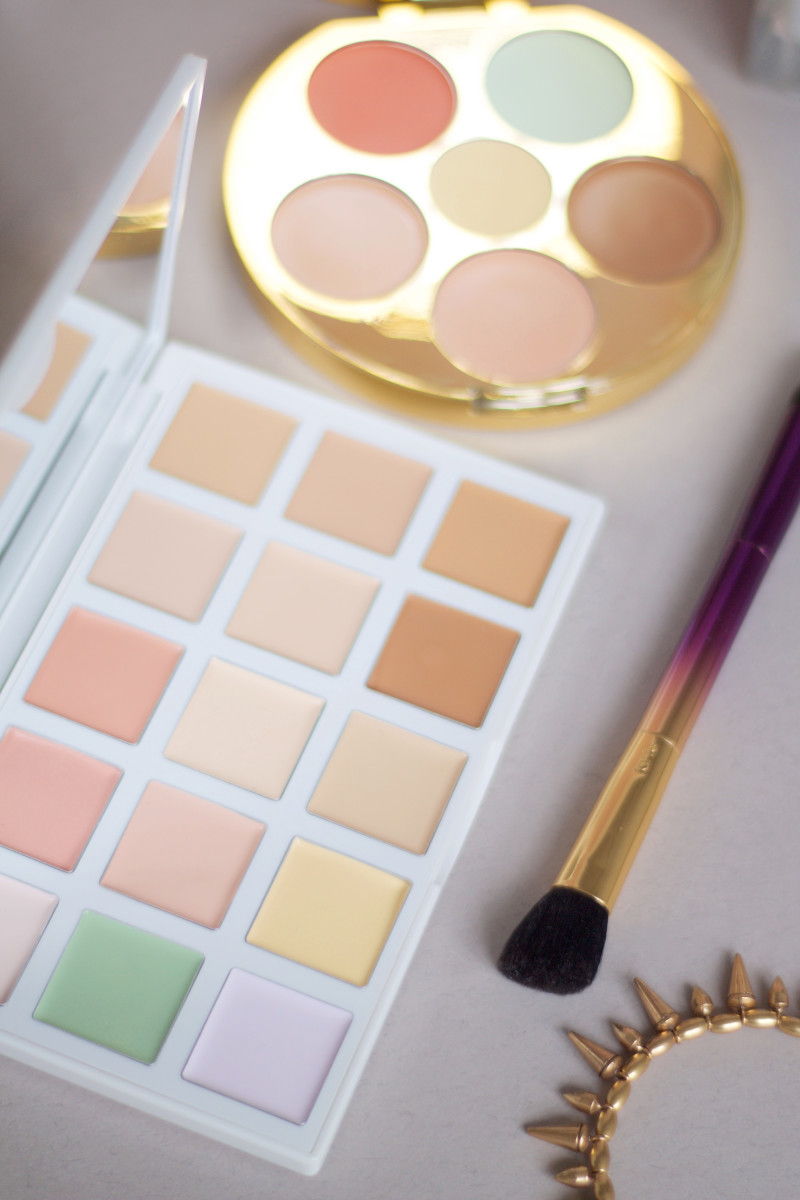
If all this has you thinking, “Gosh! I have a lot of things to correct!” then join the club (hehe). If you don't want to deal with a half-dozen products, there are a few palettes I want to alert you to, which have all your colour correction shades in one. Probably the most comprehensive is the Sephora + Pantone Universe Correct + Conceal Palette, featuring 15 creamy concealer and corrector shades. It comes in two colour palettes, Light/Medium (above) and Medium/Dark.
We've already talked about the Tarte Rainforest of the Sea Wipeout Color-Correcting Palette, which I reviewed (and wore) here. (If you're wondering why it's untouched in this photo, I was sent two samples for some reason! Didn't photograph the used one, of course.)
Although I haven't tried them yet, Stila, Viseart and Make Up For Ever also have multi-shade corrector palettes.
Conclusion

I hope I've inspired you to give colour correction a chance! Even though it is extra skin work, I think you ultimately end up requiring less colour on top, because you no longer need to distract from skin imperfections. I'm surprised by how much I like using these products—and how much better my makeup looks when I do!
Shop Editor's Picks
1. Yves Saint Laurent Touche Éclat Neutralizer | 2. Marc Jacobs Cover(t) Stick Color Corrector | 3. Urban Decay Naked Skin Color Correcting Fluid | 4. Make Up For Ever Ultra HD Concealer | 5. Make Up For Ever Step 1 Skin Equalizer Primer | 6. Tarte Colored Clay CC Eye Primer Stick
Do you use colour-corrective makeup?
What's your favourite colour corrector shade?
Have you tried any of these products?
